Correcting scratches on vinyl siding before painting is crucial to ensure a smooth and long-lasting finish. In this article, we will discuss the necessary steps to prepare the vinyl siding, choose the right paint, apply surface preparation techniques, refurbish exterior features, and finalize the process before painting. By following these guidelines, you can achieve a professional-looking result for your vinyl siding in Niagara Falls.
Key Takeaways
- Properly repairing scratches on vinyl siding is essential for achieving a smooth and durable paint finish.
- Using the right tools and materials, including repair compounds and safety gear, is crucial for effective scratch repair.
- Following a step-by-step guide ensures that minor scratches are addressed thoroughly before painting.
- Preparing the surface with primer and selecting the appropriate paint are key steps for a long-lasting finish.
- Regular maintenance and timely inspections can help preserve the appearance and integrity of your vinyl siding.
Understanding the Importance of Repairing Scratches on Vinyl Siding
Why Scratches Need Attention
Taking the time to fix scratches and blemishes can significantly enhance the final appearance of your painted vinyl siding. By addressing these minor imperfections, you ensure a smooth and long-lasting finish. Routine maintenance is key to preserving the appearance and integrity of vinyl siding. Simple cleaning and inspections can prevent the need for extensive repairs.
Impact on Paint Adhesion
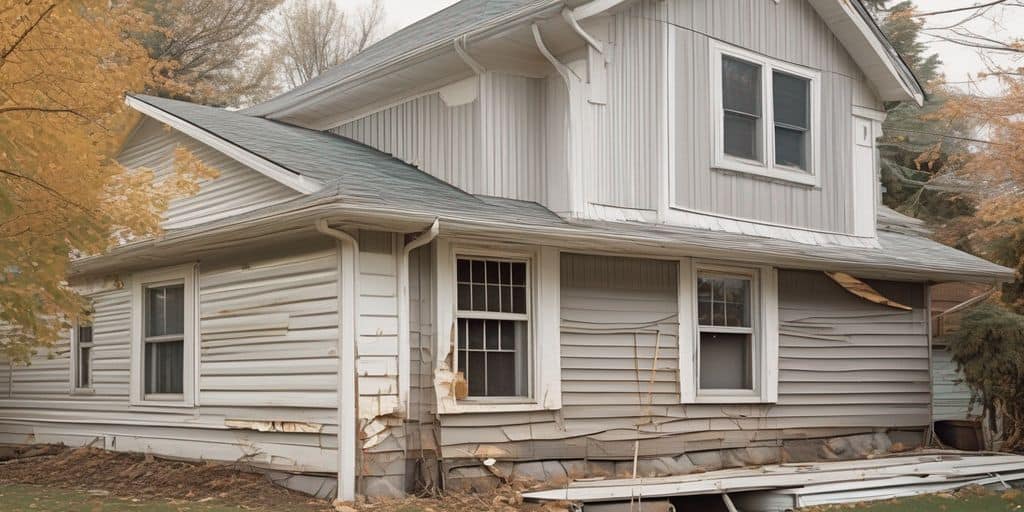
Correcting scratches on vinyl siding before painting is crucial to ensure a smooth and long-lasting finish. Scratches can create uneven surfaces that hinder paint adhesion, leading to peeling and flaking over time. By following these simple steps, you can easily repair minor imperfections and prepare your siding for a fresh coat of paint, ensuring a beautiful and long-lasting result.
Long-term Benefits
Repairing scratches not only improves the immediate appearance of your siding but also offers long-term benefits. A well-maintained vinyl siding not only enhances curb appeal but also protects your home for years to come. Regular maintenance, including cleaning and repairing scratches, is essential for long-lasting results. Use quality paint, primer, and tools to achieve a durable finish.
Essential Tools and Materials for Scratch Repair
Must-Have Tools
To effectively repair scratches on vinyl siding, you’ll need a few essential tools:
- Fine-grit sandpaper
- Soft cloths
- Putty knife
- Utility knife
- Bucket and sponge
These tools will help you clean, sand, and apply repair compounds to the scratched areas.
Choosing the Right Repair Compounds
Selecting the appropriate repair compound is crucial for a seamless fix. Small cuts and scratches can be permanently fused with a clear vinyl repair compound. Ensure the compound is compatible with vinyl siding and can withstand outdoor conditions.
Safety Gear and Precautions
Safety should always be a priority. Equip yourself with the following gear:
- Safety goggles
- Gloves
- Dust mask
These items will protect you from dust and debris while you work on the repairs.
Taking the time to gather the right tools and materials can make the repair process smoother and more efficient, ensuring a professional finish for your vinyl siding.
Step-by-Step Guide to Fixing Minor Scratches
Cleaning the Area
- Clean the area thoroughly with soapy water to remove any dirt or debris.
- Ensure the surface is completely dry before moving to the next step.
Sanding the Scratch
- Gently sand the scratch with fine-grit sandpaper, moving in the direction of the grain to avoid further damage.
- Wipe away any dust created by sanding with a clean, dry cloth.
Applying Repair Compound
- Apply a thin layer of vinyl siding repair compound to the scratch.
- Allow the compound to dry completely before proceeding with painting.
Taking the time to fix scratches and blemishes can significantly enhance the final appearance of your painted vinyl siding.
By following these simple steps, you can easily repair minor imperfections and prepare your siding for a fresh coat of paint, ensuring a beautiful and long-lasting result.
Preparing the Surface for Painting
Priming the Siding
Before you start painting, it’s crucial to prime the vinyl siding. This step ensures that the paint adheres properly and lasts longer. Begin with a thorough surface inspection to identify any areas that need special attention. Look for signs of damage, such as peeling paint or bare spots. Once identified, these areas should be sanded and cleaned. Use a high-quality primer designed for vinyl siding to create a stable foundation for the paint.
Choosing the Right Paint
Selecting the appropriate paint is essential for a durable and visually appealing finish. Opt for paint specifically formulated for vinyl siding. These paints are designed to expand and contract with the siding, preventing cracks and peeling. Consider the local climate in Niagara Falls when choosing your paint. The weather can be quite variable, so it’s important to select a paint that can withstand these conditions.
Weather Considerations
Weather plays a significant role in the painting process. Avoid painting on extremely hot or cold days, as this can affect the paint’s adhesion and drying time. Ideally, choose a day with mild temperatures and low humidity. Keep an eye on the forecast to ensure that rain is not expected for at least 24 hours after painting. This will help the paint to dry properly and provide a more durable finish.
Remember, taking the time to prepare the surface meticulously will pay off in the longevity and quality of your paint job. Skipping steps or rushing the process can lead to subpar results that may require more frequent touch-ups or complete redoing sooner than expected.
Tips for a Professional Finish
Ensuring Even Coverage
Achieving an even coverage is essential for a professional finish. Use a high-quality brush or roller to apply the paint in smooth, even strokes. Start from the top and work your way down to avoid drips and streaks. It’s also important to apply multiple thin coats rather than one thick coat to ensure a uniform appearance.
Avoiding Common Mistakes
To avoid common mistakes, make sure the surface is completely clean and dry before painting. Skipping this step can lead to poor paint adhesion and an uneven finish. Additionally, avoid painting in direct sunlight or on very windy days, as these conditions can cause the paint to dry too quickly and result in a patchy finish.
Final Touches and Inspections
After the paint has dried, inspect the surface for any missed spots or imperfections. Touch up any areas as needed to ensure a flawless finish. Finally, remove any masking tape or protective coverings carefully to avoid damaging the fresh paint. Taking the time to do these final touches will ensure a professional-looking result that lasts.
Remember, taking the time to prepare the surface meticulously will pay off in the longevity and quality of your paint job. Skipping steps or rushing the process can lead to subpar results that may require more frequent touch-ups or complete redoing sooner than expected.
Maintaining Your Vinyl Siding Post-Repair
Regular Cleaning Tips
Routine maintenance is key to preserving the appearance and integrity of vinyl siding. Simple cleaning and inspections can prevent the need for extensive repairs. Here are some tips:
- Use a soft brush or cloth to clean the siding.
- Avoid using harsh chemicals; mild soap and water are usually sufficient.
- Rinse thoroughly to remove any soap residue.
- Clean your siding at least once a year, or more frequently if you live in an area with heavy pollution or near a landmark like Niagara Falls.
Inspecting for New Damage
Regular inspections can help you catch new damage early, preventing more extensive repairs down the line. Look for:
- Cracks or splits in the siding.
- Discoloration or fading.
- Loose or missing pieces.
- Mold or mildew growth.
When to Repaint
Repainting your vinyl siding can refresh its appearance and provide additional protection. Consider repainting if you notice:
- Significant fading or discoloration.
- Peeling or flaking paint.
- Scratches or other surface damage.
Pro Tip: When repainting, choose UV-resistant paints to enhance curb appeal and protect against sun damage.
By following these maintenance tips, you can keep your vinyl siding looking great and protect your home for years to come.
When to Call a Professional
Determining whether to tackle a vinyl siding repair yourself or call a professional often depends on the extent of the damage. Minor scratches and scuffs can usually be handled with some basic tools and materials. However, if you notice deep gouges, extensive cracking, or warping, it might be time to seek expert help. Professionals have the experience and equipment to handle more severe issues effectively.
When it comes to hiring a contractor, it’s essential to do your homework. Look for contractors who specialize in vinyl siding repair and have good reviews. Ask for recommendations from friends or neighbors, and don’t hesitate to request references. A reliable contractor will provide a detailed estimate and timeline for the work. Contractor selection is crucial for quality work, especially in areas with unique weather conditions like Niagara Falls.
The cost of professional vinyl siding repair can vary widely based on the extent of the damage and the contractor’s rates. It’s a good idea to get multiple quotes to ensure you’re getting a fair price. While it might be tempting to go with the cheapest option, remember that quality workmanship often comes at a higher price. Investing in a skilled professional can save you money in the long run by preventing further damage and ensuring a longer-lasting repair.
In Niagara Falls, adapting to the local climate is essential for any exterior home project. Professionals are well-versed in addressing issues like water penetration and ensuring the longevity of your siding through regular upkeep.
Knowing when to call a professional can save you time, money, and stress. If your home’s exterior is looking dull or dated, it might be time to consider a professional touch. Our experienced team at We Paint Siding specializes in transforming homes with high-quality finishes. Don’t wait—visit our website to book a free estimate and see how we can revitalize your home’s appearance.
Conclusion
As we wrap up our guide on fixing scratches and preparing vinyl siding for painting in Niagara Falls, remember that attention to detail and proper preparation are key to a flawless finish. Whether you’re addressing minor scratches, ensuring a smooth surface, or installing weather-resistant barriers, each step contributes to the longevity and beauty of your home’s exterior. With the tips and best practices shared, you’re now equipped to tackle your siding project with confidence. Taking the time to fix scratches and blemishes can significantly enhance the final appearance of your painted vinyl siding, ensuring a beautiful and long-lasting result.
Frequently Asked Questions
Why is it important to repair scratches on vinyl siding before painting?
Repairing scratches on vinyl siding before painting is crucial to ensure a smooth and long-lasting finish. Unaddressed scratches can affect paint adhesion and lead to peeling or uneven coverage.
What tools do I need to repair scratches on vinyl siding?
You’ll need basic tools such as fine-grit sandpaper, a vinyl siding repair kit, a putty knife, and cleaning materials like soapy water and a sponge. Safety gear like gloves and goggles are also recommended.
Can I repair deep scratches on vinyl siding myself?
While minor scratches can be repaired easily with a vinyl siding repair kit, deep scratches may require professional assistance to ensure a seamless repair and avoid further damage.
How do I prepare the vinyl siding surface before painting?
Start by cleaning the area thoroughly, sanding down any rough spots, and applying a suitable primer. This will ensure better paint adhesion and a smoother finish.
What type of paint should I use on vinyl siding?
It’s recommended to use high-quality, exterior-grade acrylic paint designed specifically for vinyl siding. This type of paint is more flexible and can withstand the expansion and contraction of vinyl siding.
How often should I inspect and maintain my vinyl siding post-repair?
Regular inspections, at least once a year, are recommended to check for new damage or wear. Cleaning the siding periodically will also help maintain its appearance and durability.


