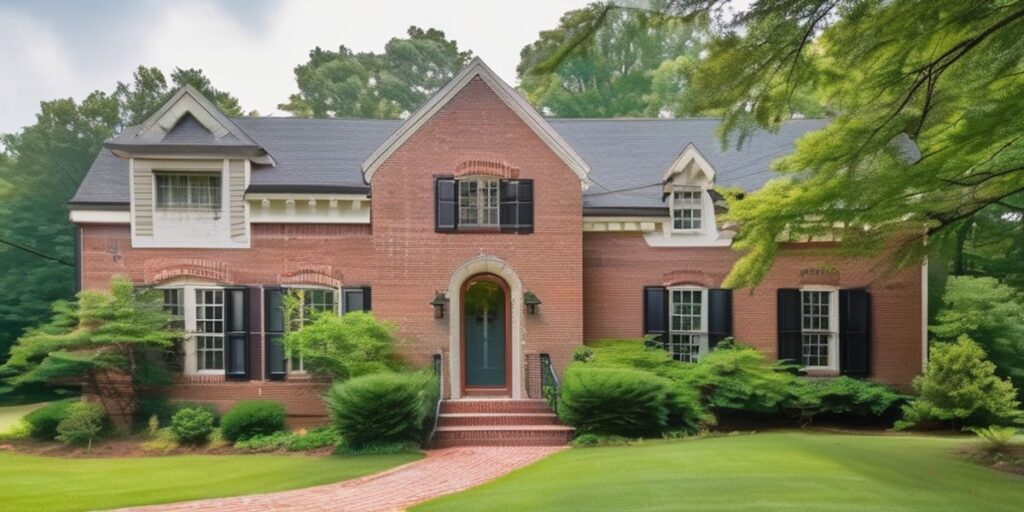
Vintage brick painting techniques can breathe new life into Cambridge’s heritage homes, preserving their historic charm while adding a touch of modernity. From choosing the right paint to applying finishing touches, each step plays a crucial role in the transformation process. Let’s explore key takeaways from each stage of this artistic endeavor.
Key Takeaways
- Understanding historic color schemes is essential for maintaining the authenticity of heritage homes.
- Opt for eco-friendly paint options to ensure sustainability and reduce environmental impact.
- Testing paint samples on a small area can help determine the final color and finish.
- Cleaning the bricks thoroughly is crucial to ensure proper adhesion of the paint.
- Layering paint for texture can create a unique and visually appealing finish.
Choosing the Right Paint
Understanding Historic Color Schemes
When it comes to painting vintage bricks, choosing the right color is paramount. The color palette should not only complement the architectural style but also adhere to the historical context of the area. Here are some key considerations:
- Historical Accuracy: Research the era in which the home was built and the colors that were traditionally used during that time. This ensures that the paint job respects the heritage of the building.
- Local Landscape: Consider the natural and built environment of Cambridge. For instance, a home near the River Cam might draw inspiration from the surrounding water and greenery.
It’s essential to balance historical authenticity with the current condition of the brickwork to achieve a harmonious look.
- Color Durability: Some pigments fade faster than others. Opt for hues that have a proven track record of maintaining their vibrancy over time.
Remember, the goal is to enhance the building’s character while ensuring that the paint job remains resilient against the elements.
Eco-Friendly Paint Options
When considering the revitalization of heritage homes, the choice of paint can have a significant impact on both the environment and the longevity of the paint job. Eco-friendly paints are not only better for the planet but also for the health of those living in and around the home. Here are some key considerations:
- Low VOCs: Paints with low volatile organic compounds (VOCs) are less harmful to air quality and reduce the risk of health issues.
- Natural Ingredients: Look for paints that use natural ingredients such as water, plant oils, and resins.
- Sustainable Production: The manufacturing process should have minimal impact on the environment.
- Durability: Eco-friendly paints should also be durable to prevent frequent reapplications.
When selecting eco-friendly paint options, it’s essential to balance environmental considerations with the aesthetic and protective needs of the building.
In addition to these factors, it’s important to explore different ways to paint brick for unique looks. Techniques such as color wash, rustic ambiance, and whitewash can offer a fresh and environmentally conscious approach to updating a heritage home’s appearance.
Testing Paint Samples
Before committing to a full-scale painting project on your heritage home, it’s crucial to test paint samples. This step ensures that the chosen shade not only matches your vision but also the home’s historical character. Testing small areas helps in visualizing the final outcome and can prevent costly mistakes.
- Select a discreet section of the brickwork to apply your samples.
- Test multiple shades to compare how they interact with the home’s surroundings and lighting throughout the day.
- Allow the paint to dry completely; this will give you the truest color representation.
Remember, the goal is to enhance the home’s historical features, not overshadow them.
When testing paint samples, consider the durability of the paint. A sample test can reveal how the paint adheres to the brick surface and its resistance to weathering. It’s also an opportunity to assess the ease of application and the number of coats required for a uniform finish.
Preparing the Surface
Cleaning the Bricks Thoroughly
Before applying a fresh coat of paint to vintage bricks, it’s crucial to ensure that the surface is impeccably clean. Dirt, moss, and other residues not only compromise the paint’s adherence but can also lead to premature deterioration. Here’s a simple guide to effectively clean the bricks:
- Start by removing debris from the brick surface with a stiff-bristled brush.
- Apply a gentle, eco-friendly cleaning solution to avoid damaging the bricks.
- Scrub the surface with the solution using a brush or sponge.
- Rinse the bricks thoroughly with water to remove all traces of the cleaning solution.
- Allow the bricks to dry completely before proceeding to the next steps.
It’s essential to tackle any repair work after cleaning and before painting. This ensures a smooth and stable surface for the paint to adhere to.
Remember, while cleaning, avoid harsh chemicals that can erode the brick’s surface. If you’re working on a heritage home near a Cambridge landmark, such as the King’s College Chapel, take extra care to preserve the historical integrity of the bricks.
Repairing Any Damage
Before applying primer and paint, it’s crucial to ensure that the brick surface is in good condition. Repairing any damage is a step that cannot be overlooked. Here’s how to approach it:
- Identify all cracks, chips, and other forms of damage on the brick surface.
- Remove loose material with a chisel and brush.
- Fill the gaps with a suitable mortar mix, carefully matching the existing mortar color and texture.
Repairing damage not only improves the appearance but also prevents future issues such as water ingress. It’s important to manage moisture and avoid harsh chemicals that can further damage the bricks. After the repairs, allow sufficient drying time before moving on to priming and painting.
Ensuring that the brickwork is properly repaired will provide a solid foundation for the paint, leading to a long-lasting, transformed look.
Applying a Primer
Once the surface of the brick is clean and any damage has been repaired, it’s time to apply a primer. Priming is a crucial step in ensuring that your paint adheres properly and provides a uniform surface for the topcoat. Here are some key points to consider when applying primer to your heritage home’s bricks:
- Select a primer that is specifically designed for masonry or brick surfaces. This will help in providing a strong foundation for the paint.
- Apply the primer evenly across the surface, making sure to cover all nooks and crannies. A brush may be more suitable for this task to get into the deeper mortar lines.
- Allow the primer to dry completely before proceeding with the topcoat. This may take anywhere from a few hours to a full day, depending on the product and weather conditions.
Remember, a well-applied primer can significantly extend the life of your paint job, protecting the brickwork and maintaining the aesthetic appeal of your home.
If you’re painting near a Cambridge area landmark, such as the historic King’s College Chapel, take extra care to choose a primer that will not only protect your home but also respect the surrounding architecture.
Applying the Paint
Brush vs. Roller Techniques
When painting vintage bricks, the choice between using a brush or a roller can significantly affect the outcome of your project. Brushes are excellent for achieving detailed work and getting into the nooks and crannies of the brickwork. On the other hand, rollers can cover large areas more quickly and provide a more uniform coat.
-
Brushes:
- Ideal for precision
- Better for textured surfaces
- Requires more time
-
Rollers:
- Faster application
- Suitable for smooth surfaces
- Can result in a less detailed finish
It’s important to consider the type of brick and the desired finish when choosing your application method. For instance, a roller might not be the best choice for highly textured or damaged bricks where the brush can reach into deeper grooves.
Remember to always test your chosen method on a small, inconspicuous area before fully committing to the entire surface. This allows you to see the effect and ensure it meets your expectations for the heritage home.
Layering Paint for Texture
Layering paint on bricks can create a rich texture that adds depth and character to the surface. The key to successful layering is to build up the paint gradually, allowing each layer to dry before applying the next. This technique is particularly effective for vintage homes, where a textured look can complement the historical architecture.
Layering involves a few essential steps:
- Start with a thin base coat and let it dry completely.
- Apply a second coat, using a lighter touch and uneven strokes to allow the base color to show through in places.
- Add additional layers as desired, varying the thickness and opacity to enhance the texture.
Remember, the goal is to achieve a look that has evolved over time, suggesting a narrative of the home’s history.
While the process can be time-consuming, the end result is a beautifully nuanced facade that resonates with the heritage of the area. For instance, a home near the iconic King’s College Chapel could benefit from such a technique, subtly echoing the storied texture of its surroundings.
Achieving a Weathered Look
To create an authentic weathered look on your vintage brickwork, a strategic approach is essential. This technique allows the painted surface to blend seamlessly with the historical ambiance of Cambridge’s heritage homes.
- Start by choosing a base paint color that reflects the natural aging process of brick. A muted, earthy tone often works best.
- Apply the base coat and allow it to dry completely before proceeding.
- Next, use a sponge or dry brush to lightly dab a contrasting color onto the bricks. This creates the illusion of natural wear and tear.
- Focus on areas that would naturally show more weathering, such as edges and corners.
Remember, the key to a convincing weathered look is subtlety. The goal is to enhance the brick’s character, not to overshadow it.
- Finally, step back frequently to assess your work from a distance. Adjust your technique as needed to ensure a balanced and realistic effect.
While the weather in Cambridge can contribute to the natural aging of brick, this painting technique allows you to control the outcome for a desired aesthetic.
Finishing Touches
Sealing the Paint for Durability
After the meticulous process of painting, it’s crucial to seal the paint to ensure its longevity. This final step protects the brickwork from various elements and helps maintain the aesthetic quality of the paint job over time.
- Use water repellents to shield against moisture penetration.
- Apply UV blockers to prevent fading from sunlight exposure.
- Consider anti-graffiti coatings for easy cleaning in case of vandalism.
Sealing is not just about protection; it also enhances the paint’s appearance, giving it a finished look. Regular maintenance, including gentle cleaning, is essential to preserve the sealant’s effectiveness and the overall integrity of the brickwork.
While sealing is a protective measure, it’s also an opportunity to highlight architectural features. By choosing the right sealant, you can enhance the natural beauty of the bricks and ensure that the paint remains vibrant and true to the historic color scheme.
Remember, the goal is to prioritize breathability and moisture control to avoid trapping any moisture that could lead to damage. A well-sealed surface will provide long-term durability, safeguarding your investment and the heritage of the home.
Adding Decorative Accents
After selecting the perfect paint and applying it with care, adding decorative accents can truly elevate the appearance of a heritage home. Consider the architectural style and the impact of natural light when choosing accents for window frames and other features.
- Use complementary colors to create a cohesive look.
- Introduce patterns or subtle textures to add depth.
- Upgrade hardware for a fresh, yet timeless appearance.
Incorporating decorative accents is not just about aesthetics; it’s about honoring the home’s history while infusing personal style. For instance, you might choose earthy tones that harmonize with the surrounding environment, enhancing the home’s curb appeal.
When selecting accents, it’s essential to preserve the historic charm of the property. Match your choices with the architectural features to maintain the integrity of the home’s design.
Remember, the goal is to complement the home’s existing features, not to overshadow them. By thoughtfully adding decorative accents, you ensure that the home remains a testament to its era while showcasing your personal touch.
Maintaining the Paint Job
Once your vintage brick home in Cambridge has been beautifully painted, maintaining the paint job is crucial to ensure its longevity and charm. Regular maintenance is key to preserving the aesthetic appeal and protecting the underlying brickwork.
- Inspect the painted surfaces annually for any signs of peeling or chipping.
- Gently clean the painted bricks with a soft brush and mild detergent to remove dirt and pollutants.
- Touch up any areas where the paint has deteriorated to prevent further damage.
It’s important to allow the bricks to breathe; hence, choosing the right type of paint that offers both durability and breathability is essential. In the variable climate of Cambridge, this becomes even more pertinent to protect against moisture and temperature changes.
Remember, the goal is to maintain the painted brick exteriors with attention to detail and breathability. Consult professionals for best practices and choose durable paint for longevity.
By following these simple steps, you can enjoy the timeless beauty of your painted heritage home for many years to come.
As you put the final touches on your home’s exterior, remember that a fresh coat of paint can make all the difference. At We Paint Siding, we specialize in giving your home that much-needed facelift with our professional painting services. Whether it’s aluminum siding, vinyl, or stucco, our expert team is ready to transform your property. Don’t settle for a faded and outdated look; visit our website to explore our services, view stunning before-and-after galleries, and book your free estimate today. Let us help you revitalize your home with a splash of color and expert craftsmanship.
Conclusion
In conclusion, exploring vintage brick painting techniques for Cambridge’s heritage homes can be a rewarding and creative endeavor. By understanding the history of these techniques and applying them with care and attention to detail, homeowners can enhance the beauty and charm of their properties while preserving the historical significance of the area. Whether you choose to restore the original brickwork or experiment with new colors and finishes, the possibilities are endless. Embrace the rich heritage of Cambridge through the art of vintage brick painting and watch as your home transforms into a timeless masterpiece.
Frequently Asked Questions
Can I paint over existing brick paint?
Yes, but it’s important to properly prepare the surface before applying a new coat of paint.
How long does painted brick last?
With proper maintenance and care, painted brick can last for many years.
Can I use regular house paint on bricks?
Yes, but it’s recommended to use paint specifically designed for masonry surfaces for better durability.
Will painting brick affect its texture?
Painting brick can alter its texture slightly, but techniques like layering can help maintain a textured appearance.
How do I clean painted brick surfaces?
Regularly cleaning painted brick with a mild detergent and water can help maintain its appearance.
Can I change the color of painted brick?
Yes, you can repaint painted brick to change its color, but proper preparation is key for a successful outcome.


