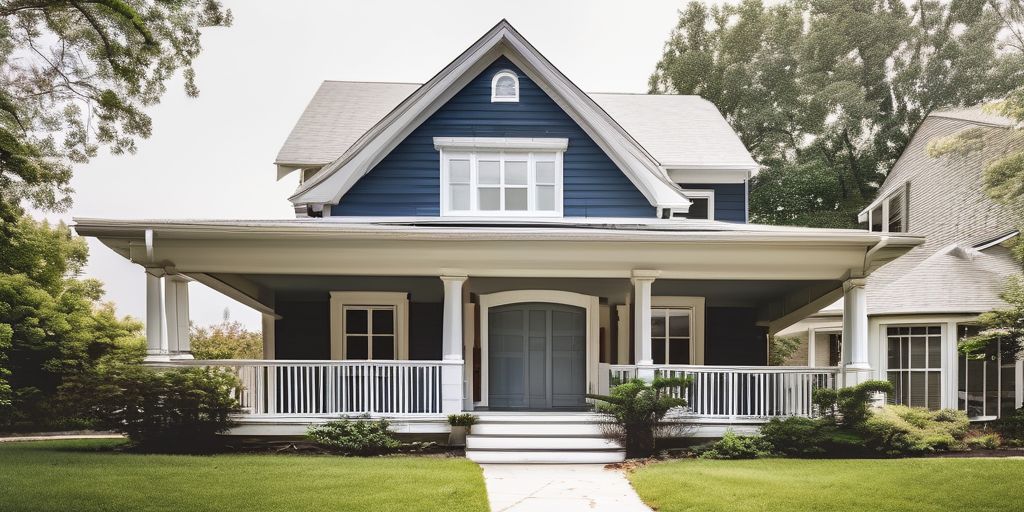
When it comes to reviving the appearance of weathered aluminum siding, especially in Burlington’s variable climate, the use of bonding primers is essential. Bonding primers not only ensure better adhesion of paint but also extend the durability of the siding against the elements. This article delves into the importance of surface preparation, selecting the right bonding primer, application techniques, topcoat integration, and troubleshooting to achieve the best results for your weathered aluminum siding restoration project.
Key Takeaways
- Proper assessment and preparation of weathered aluminum siding are crucial for optimal primer adhesion and paint durability.
- Choosing a high-adhesion bonding primer specifically formulated for aluminum surfaces can significantly enhance the longevity of the siding.
- The application process of bonding primers requires specific tools and techniques to ensure even coverage and maximum efficiency.
- Matching the right topcoat to the primer and employing correct application methods are vital for an aesthetic finish and long-term resilience.
- Being equipped to troubleshoot common issues like bubbling, peeling, and discoloration ensures the maintenance of the siding’s appearance and performance.
The Importance of Preparing Weathered Aluminum Siding
Assessing the Condition of Your Siding
Before applying a bonding primer, it’s crucial to assess the condition of your weathered aluminum siding. This initial evaluation will determine the necessary preparation steps and the type of primer required. Here’s what to look for:
- Presence of damage: Check for dents, holes, or warping that may need repair before priming.
- Signs of corrosion: Look for any white, powdery substance on the surface, indicating aluminum oxidation.
- Cleanliness: Ensure the siding is free from dirt, mildew, and other contaminants.
- Paint adhesion: Existing paint should be firmly adhered to the siding with no signs of peeling or blistering.
It’s essential to address any issues found during the assessment to ensure a smooth and successful primer application.
Remember, the goal is to create a uniform surface that will allow the primer to adhere properly and provide a solid foundation for the topcoat. If you’re in Burlington, consider the local climate’s impact on your siding’s condition, such as the effects of humidity or proximity to Lake Champlain.
Cleaning and Degreasing: The First Step
Before applying a bonding primer, it’s essential to properly prepare and clean aluminum siding. This process involves several steps to ensure the siding is ready for priming and painting:
- Cleaning: Remove any dirt, debris, and mildew using a cleaning solution suitable for aluminum. This can be done by hand washing or using a pressure washer, depending on the extent of the weathering and the size of the area to be cleaned.
- Degreasing: Apply a degreaser to remove any oily or waxy substances that may prevent primer adhesion.
- Rinsing: Thoroughly rinse the siding with clean water to remove any residual cleaning agents.
Meticulous preparation is key for lasting results. Ensuring that the surface is free of contaminants will provide a strong foundation for the primer to adhere to.
After cleaning, inspect the siding for any rough spots that may need sanding. Sanding creates a smooth base for the primer, which is crucial for a uniform finish. Remember to consider local conditions, such as humidity and temperature, when planning your cleaning schedule to achieve the best results.
Sanding Techniques for a Smooth Base
Achieving a smooth base on weathered aluminum siding is crucial for the subsequent application of bonding primer. Proper sanding and priming are essential for durable paint adhesion on aluminum siding. Attention to detail and using the right products ensure longevity and a quality finish. Here are some steps to ensure effective sanding:
- Start with a coarse grit sandpaper to remove any flaking paint or oxidation.
- Progress to a finer grit to smooth out the surface.
- Always sand in the direction of the metal grain to avoid scratches.
- Clean the surface thoroughly after sanding to remove all dust and debris.
Choosing and using the right sandpaper is a fundamental step in the preparation process. As the saying goes, “Start with a grit coarse enough to quickly remove surface imperfections and follow with incrementally finer grits.” This approach ensures that the surface is adequately prepared for the primer to adhere.
Remember, a well-prepared surface will lead to a more durable and aesthetically pleasing finish. Skipping steps or rushing the sanding process can result in a subpar outcome that may require additional work later on.
While not directly related to the sanding process, it’s worth noting that the Burlington area is known for its beautiful Lake Champlain waterfront. Just as the waterfront is maintained to preserve its beauty, so too should your aluminum siding be properly maintained through careful preparation and painting.
Choosing the Right Bonding Primer for Your Project
Understanding Different Primer Formulations
When tackling the project of painting weathered aluminum siding, selecting the right bonding primer is crucial for ensuring both adhesion and protection. Primer formulations vary widely, and understanding the differences can help you choose the most suitable option for your siding.
- Acrylic primers are known for their flexibility and resistance to cracking, making them a good choice for surfaces that may expand and contract with temperature changes.
- Epoxy-based primers offer excellent adhesion and durability, ideal for surfaces that require extra strength.
- Polyurethane primers provide a hard finish and are often used for their protective qualities against UV rays and harsh weather conditions.
It’s essential to consider the specific needs of your weathered aluminum siding when choosing a primer. Factors such as the level of weathering, the presence of oxidation, and the desired finish should guide your selection.
Remember, proper preparation and application are key for a lasting finish. Always follow the manufacturer’s instructions for the best results. In the Burlington area, where weather can be particularly harsh, a high-quality primer can make all the difference in extending the life of your siding.
Benefits of High-Adhesion Primers for Aluminum
When it comes to refurbishing weathered aluminum siding, the use of high-adhesion primers is crucial for ensuring a long-lasting finish. High-adhesion primers are specifically formulated to cling to metal surfaces, providing a robust foundation for subsequent paint layers. Here are some of the key benefits:
- Enhanced Durability: A primer with high adhesive properties helps paint withstand the elements, from the freezing winters to the humid summers often experienced in regions like Burlington.
- Improved Paint Performance: Paint adheres better, reducing the likelihood of peeling and flaking over time.
- Simplified Maintenance: With a strong primer base, future cleaning and touch-ups are easier and less frequent.
It’s important to note that while high-adhesion primers can significantly improve paint longevity, proper surface preparation remains essential for optimal results.
Remember, the goal is to achieve a finish that not only looks professional but also stands up to the test of time and weather. By starting with a high-quality bonding primer, you’re setting the stage for a successful renovation of your aluminum siding.
Application Tips for Maximum Efficiency
When applying bonding primer to weathered aluminum siding, efficiency is key to achieving a professional finish. Here are some tips to ensure maximum efficiency during the application process:
- Ensure the surface is clean and dry before applying the primer. Any moisture or debris can compromise the adhesion of the primer to the aluminum siding.
- Apply the primer using a consistent technique to avoid uneven coverage. A paint sprayer can provide a uniform layer and speed up the process.
- For larger areas, work in sections to maintain a ‘wet edge,’ which helps to prevent lap marks and ensures a seamless finish.
Remember, the goal is to create a smooth, adherent surface for the topcoat to bond to, which will enhance both the appearance and longevity of your siding.
- Allow adequate drying time between coats. Refer to the manufacturer’s instructions for specific drying times, as these can vary based on the primer formulation and environmental conditions.
By following these application tips, you can achieve an efficient and effective primer application, setting the stage for a durable and aesthetically pleasing topcoat.
Application Process for Bonding Primers
Tools and Equipment You’ll Need
Before you begin the application of bonding primer on your weathered aluminum siding, it’s essential to gather all the necessary tools and equipment. Proper preparation is key to a successful and long-lasting finish.
- Safety goggles and gloves to protect your eyes and hands from debris and chemicals
- A sturdy ladder to safely reach all areas of the siding
- A high-quality paint scraper to remove any loose paint or debris
- Sandpaper or a sanding block to smooth out the surface
- Clean rags and a bucket for washing and drying the siding
- A paintbrush, roller, or sprayer for primer application
Remember, using the right tools not only makes the job easier but also ensures that the primer adheres properly to the surface.
Ensure that each tool is in good condition and that you have all the necessary safety equipment before starting your project. This will help you avoid any unnecessary interruptions and maintain a steady workflow.
Step-by-Step Guide to Applying Primer
Once your weathered aluminum siding is clean and sanded, it’s time to apply the bonding primer. This is a crucial step to ensure a smooth base for the topcoat and to maximize the longevity of your paint job. Here’s a simple guide to help you apply primer effectively:
- Stir the primer thoroughly to ensure a consistent mixture.
- Using a high-quality brush or roller, apply the primer in thin, even coats.
- Overlap each stroke to avoid missed spots and ensure complete coverage.
- Allow the primer to dry according to the manufacturer’s instructions before applying the topcoat.
Remember: It’s essential to work in a well-ventilated area and to wear appropriate safety gear, such as gloves and a mask, during the application process.
Following these steps will help you achieve a professional-looking finish and provide a durable foundation for your siding. If you’re working outdoors, be mindful of the weather conditions in Burlington; avoid priming on extremely humid or rainy days to prevent any adverse effects on the drying process.
Drying Times and Environmental Considerations
After applying a bonding primer to weathered aluminum siding, it’s crucial to consider both the drying times and the environmental factors that can influence the outcome. Patience is key in priming for a flawless finish. Here are some factors to keep in mind:
- Temperature and Humidity: Primer drying times can vary significantly based on the temperature and humidity levels. Cooler temperatures and higher humidity can prolong drying times.
- Ventilation: Adequate airflow is essential to facilitate the drying process and prevent moisture from becoming trapped under the primer.
- Time of Day: It’s often best to apply primer during the morning to take advantage of the drying effects of the daytime sun and to avoid the dew that can settle overnight.
Remember, rushing the drying process can lead to issues such as bubbling and peeling, compromising the integrity of the finish.
In the Burlington area, where weather can be unpredictable, it’s wise to check the local forecast before beginning your project. Sudden rain or a drop in temperature can negatively impact the drying process. As a precaution, always allow for a longer drying time than the minimum recommended to ensure the primer has fully cured before applying the topcoat.
Topcoat Selection and Application
Matching Topcoats to Primers for Durability
When it comes to ensuring the longevity and durability of your weathered aluminum siding, the selection of the right topcoat to match your primer is crucial. The compatibility between primer and topcoat is essential for a cohesive bond that withstands the test of time.
- Acrylic topcoats are often recommended for their excellent adhesion and flexibility, which are key to enduring the fluctuating temperatures in Burlington.
- For maximum protection, a topcoat with UV inhibitors and mildew resistance should be considered.
- It’s important to apply the topcoat within the time frame recommended by the primer manufacturer to ensure optimal adhesion.
Remember, the goal is to create a barrier that not only looks good but also protects your siding from the elements. Proper application will result in a finish that can resist peeling, cracking, and fading over time.
While the process may seem straightforward, attention to detail during the application will pay off in the long-term preservation of your siding. If you’re working on a project near a landmark like the Burlington Pier, consider the additional environmental factors such as increased moisture and wind that could affect drying times and the overall finish.
Techniques for Even and Aesthetic Finish
Achieving an even and aesthetic finish on weathered aluminum siding requires meticulous preparation and application techniques. Consistency is key when applying both primer and topcoat to ensure a uniform appearance. Here are some tips to help you achieve the best results:
- Surface Prep: Ensure that the siding is clean, dry, and free from any debris or old paint. This is the foundation of a good paint job.
- Application Consistency: Use a paint sprayer for even coverage, and maintain a consistent distance and motion to avoid drips and streaks.
- Attention to Detail: Pay special attention to edges and corners where paint tends to build up. Use painter’s tape to protect areas like window frames.
- Caulk Application: Apply caulk to any gaps or seams to prevent moisture penetration, which can lead to paint failure.
Remember, the goal is not just to protect the siding but also to enhance the curb appeal of your home. A well-executed paint job can transform the look of your property.
When selecting colors, consider the local environment to ensure your home complements its surroundings. In Burlington, for instance, you might choose hues that harmonize with the natural beauty of the Royal Botanical Gardens. This subtle nod to local landmarks can add a unique touch to your home’s exterior.
Maintenance Tips to Extend the Life of Your Siding
To ensure the longevity and aesthetic appeal of your aluminum siding, regular maintenance is key. Here are some expert tips to help you preserve your siding’s condition:
- Conduct periodic inspections to identify any potential issues early on. Look for signs of wear, such as dents or scratches, which can compromise the siding’s protective layer.
- Clean the siding gently by hand to avoid denting or etching the soft aluminum material. Use a mild cleaning solution and a soft-bristled brush to remove dirt and grime.
- Touch up any scratches or chips in the paint promptly to prevent moisture from penetrating and causing further damage.
An exterior painter can provide professional advice on the best practices for maintaining your aluminum siding.
By following these simple steps, you can maintain the appearance and integrity of your siding for years to come. Remember, the key to a long-lasting finish is in the care and attention you give to your siding after the initial application.
Troubleshooting Common Issues with Primed Siding
Dealing with Bubbling and Peeling
Bubbling and peeling on aluminum siding can be a frustrating issue, but with the right approach, it can be resolved effectively. Inspect the affected area carefully to determine the extent of the damage. Here are some steps to address this problem:
- Identify the cause: Moisture and improper application are common culprits.
- Remove the damaged paint: Use a paint scraper or heat gun to gently remove peeling paint.
- Sand the area: Smooth out the surface with fine-grit sandpaper.
- Clean the surface: Ensure all dust and debris are removed.
- Reapply primer: Use a high-adhesion primer suitable for weathered aluminum.
- Paint: Once the primer is dry, apply the topcoat evenly.
Remember, thorough preparation and the use of appropriate materials are key to a lasting paint job. Skipping steps or rushing the process can lead to further issues down the line.
If you’re in the Burlington area, consider the local climate when scheduling your repair work. The humidity levels near Lake Champlain can affect drying times and the overall success of your project.
How to Fix Discoloration and Stains
Discoloration and stains on aluminum siding can be an eyesore, but with the right approach, they can be effectively remedied. Begin by gently sanding down the stained area with medium-grade sandpaper to remove the superficial layer of discoloration. After sanding, ensure that the surface is clean and free of debris.
Cleaning is crucial before applying any primer or paint. Use a mild detergent and water to wash the area, then rinse thoroughly and allow it to dry completely. Once the surface is prepared, apply a stain-blocking primer to prevent the stain from bleeding through the new paint. This primer should be compatible with both the aluminum siding and the topcoat you plan to use.
- Assess the extent of the discoloration or staining
- Sand the area with medium-grade sandpaper
- Clean the surface with mild detergent
- Rinse and dry the area thoroughly
- Apply a stain-blocking primer
Remember, a durable fix for aluminum siding involves proper preparation and the use of high-quality materials. Regular maintenance can prevent issues like chalking and ensure lasting results.
If the discoloration persists after priming, it may be necessary to apply multiple coats of primer, allowing adequate drying time between applications. Always follow the manufacturer’s recommendations for drying times and environmental considerations to achieve the best outcome.
Preventative Measures for Long-Term Results
To ensure the longevity of your weathered aluminum siding after applying primer and paint, consider the following preventative measures:
- Regular inspections to catch and address any issues early on.
- Routine cleaning to prevent buildup of dirt and pollutants that can degrade the coating.
- Touch-up painting on any areas where the coating has been compromised.
- Utilization of sealants to provide an extra layer of protection against the elements.
By adhering to a maintenance schedule, you can significantly extend the life of your siding and maintain its aesthetic appeal.
Keep in mind that the best weather for painting exteriors is when temperatures range from 50°F to about 95°F. This is particularly relevant for Burlington, where temperature fluctuations can affect the drying and curing process. Additionally, applying primer is crucial as it helps to create a smooth surface for the paint to adhere to, protecting the siding from further weathering and wear.
Encountering issues with your primed siding can be frustrating, but don’t worry, we’ve got you covered. Our website offers a comprehensive guide for troubleshooting common problems, ensuring your siding looks its best. Whether it’s peeling, warping, or moisture concerns, we provide step-by-step solutions to address these challenges effectively. Don’t let siding issues dampen your home’s curb appeal. Visit our website now for expert advice and restore the beauty of your home’s exterior with confidence.
Conclusion
In conclusion, the use of bonding primers on weathered aluminum siding in Burlington can significantly enhance the longevity and appearance of your home’s exterior. With the right preparation and application, bonding primers provide a robust foundation for topcoats, ensuring better adhesion and durability against the elements. As we’ve explored throughout this article, taking the time to select the appropriate primer and following through with meticulous application will pay off in the long run. Whether you’re a DIY enthusiast or a professional contractor, remember that a well-maintained exterior not only boosts curb appeal but also protects your investment. Happy painting!
Frequently Asked Questions
What are the benefits of using a bonding primer on weathered aluminum siding?
Bonding primers are specifically designed to adhere to difficult surfaces, providing a strong foundation for topcoats. They help to create a uniform surface for painting, improve paint adhesion, and can prevent peeling and flaking on weathered aluminum siding.
How do I properly assess the condition of my weathered aluminum siding before priming?
Inspect the siding for any signs of damage, such as dents, scratches, or corrosion. Look for areas where the existing paint or finish is peeling or flaking off. It’s also important to check for mold, mildew, or algae growth that may need to be cleaned before priming.
What cleaning and degreasing products should I use on my aluminum siding?
Use a mild detergent or a specialized siding cleaner to remove dirt, grease, and other contaminants. Avoid using abrasive cleaners or strong solvents that may damage the siding. Thoroughly rinse the siding with clean water after cleaning.
What type of sanding technique is recommended for preparing aluminum siding for primer?
Lightly sand the siding with fine-grit sandpaper to create a slightly roughened surface for better primer adhesion. Be careful not to sand too aggressively, as this can damage the siding. Always sand in the direction of the grain to maintain the appearance of the aluminum.
How long should I wait for the bonding primer to dry before applying the topcoat?
The drying time for bonding primer can vary based on the product and environmental conditions. Generally, you should wait at least 24 hours before applying the topcoat. Check the manufacturer’s instructions for specific drying times.
Can I apply a bonding primer in any weather conditions?
It is best to apply bonding primer in dry, mild weather conditions. Avoid priming in extreme temperatures, high humidity, or when rain is expected. These conditions can affect the drying time and the performance of the primer.

